How to Connect a Trailer Tail Light
When you purchase a new food trailer, the trailer's tail lights need to be connected to your private car, requiring modifications to your vehicle. Typically, this task is performed by the service department of your car's dealership.
The wiring for your car's tail lights is located beneath the dashboard. When you inform the technicians at the dealership that you need to connect a trailer, they will know how to modify your car for you. They will remove the main or passenger-side doors and the rear bumper, routing the wires for brake lights, turn signals, and fog lights to the rear of your private car. Of course, you cannot perform this task yourself unless you are also an automotive technician.
We provide a universal 7-core socket and plug. Your technician will know how to connect them. Here is a diagram:
The trailer's tail light system is configured as follows:
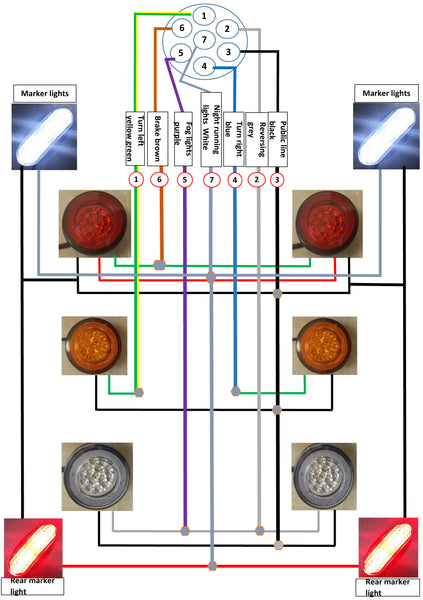
At the front of the trailer, there is one white clearance light on each side. At the rear of the trailer, there are three sets of indicator lights and one set of red clearance lights.
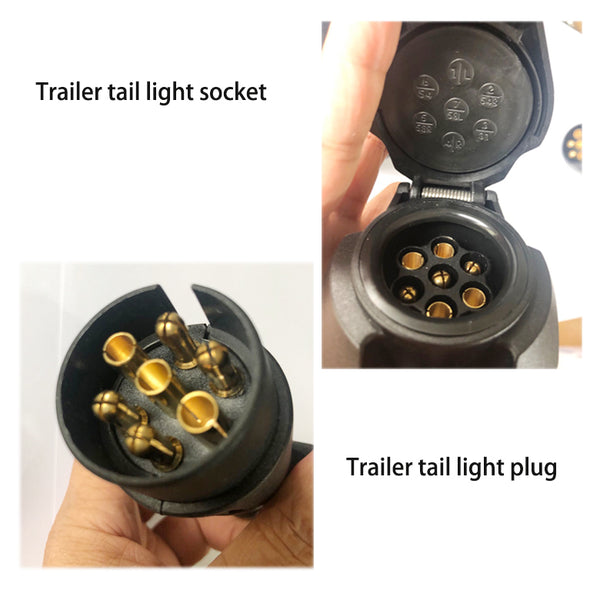
Yellow is for left and right turn signals. Red is for running lights and brake lights. White is for reverse lights and fog lights. Please refer to the images below:
Once your private car is modified, you can now test the trailer's tail lights by connecting it to the trailer.
We rigorously test all tail lights before leaving the factory, making it an easy process. If you have any questions, feel free to contact me.
